How To Make A Modded Minecraft Server In 2026
Why Host Your Own Modded Minecraft Server?
The modded Minecraft community has created thousands of amazing mods that can completely transform your Minecraft experience. From tech mods that add complex machinery to magic mods that introduce spellcasting systems, the possibilities are endless. Hosting your own modded server means you can create the perfect modpack for you and your friends, control every aspect of your world, and play together on your own schedule. Plus, with modern hosting services, setting up a server is straightforward, and splitting costs with friends makes it incredibly budget-friendly—typically only $1-2 per person monthly!
Best Modded Minecraft Server Hosting Platforms
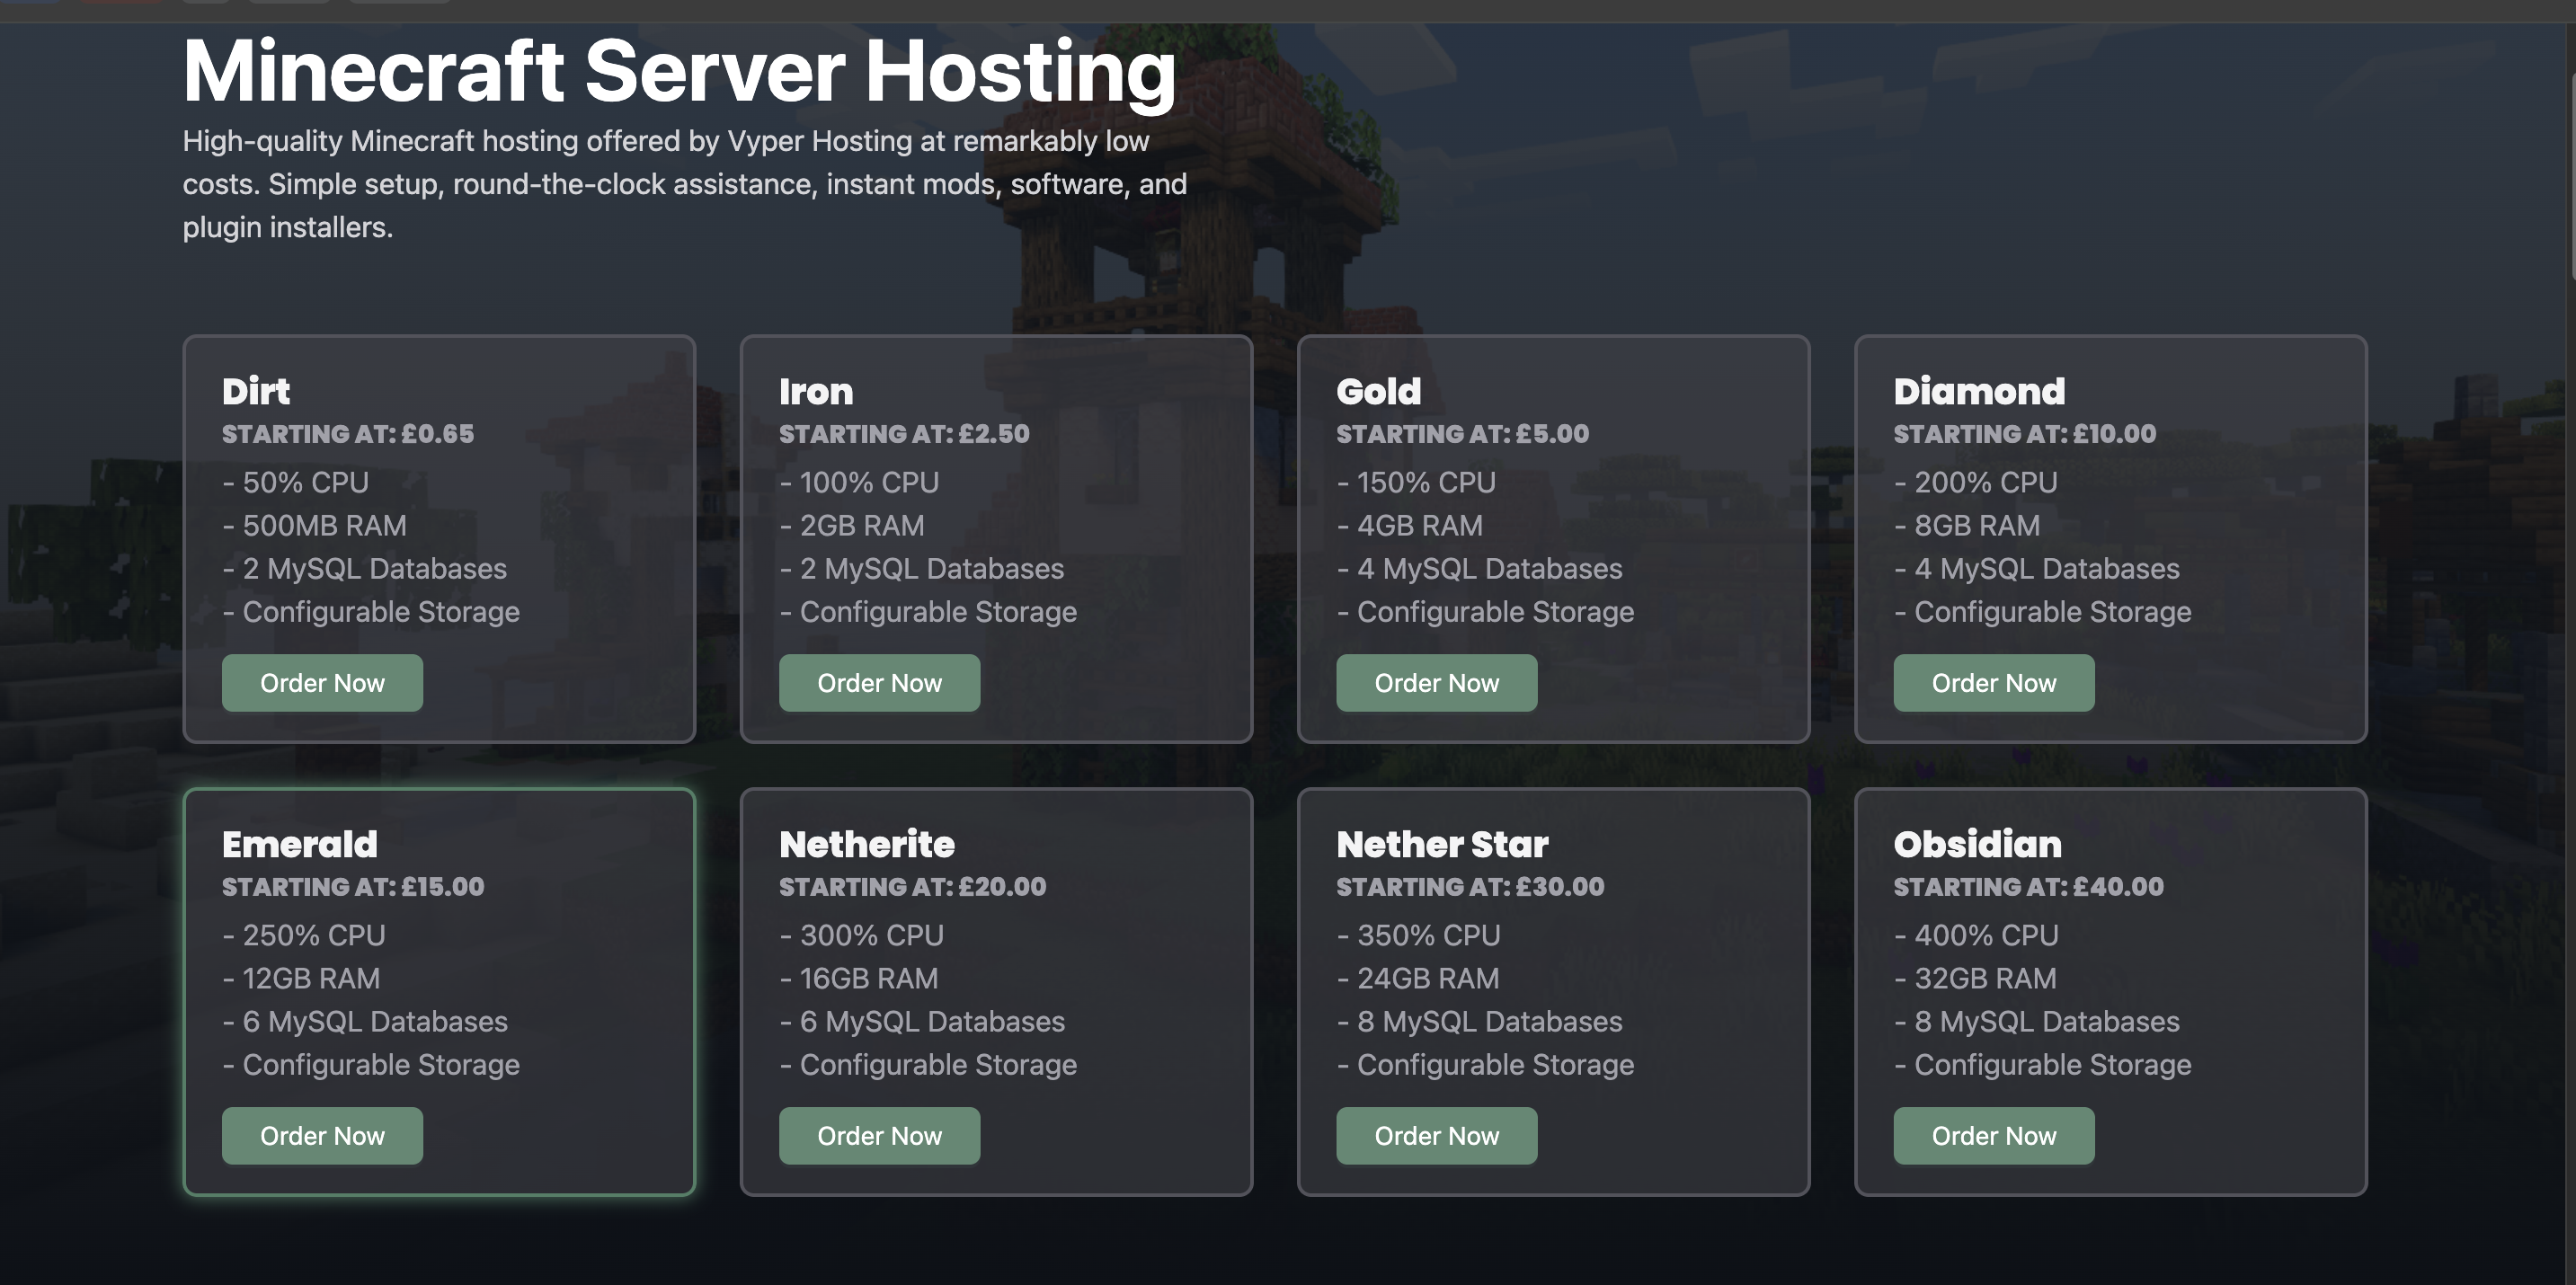
Selecting the right hosting provider is crucial for a smooth modded Minecraft experience. After testing various platforms, I've found that Vyper Hosting consistently delivers the best performance and value. Their servers are optimized for modded gameplay, their control panel is intuitive even for beginners, and their support team is responsive and helpful. While alternatives like Apex Hosting are solid choices, Vyper Hosting's combination of price, performance, and features makes it my top recommendation for modded Minecraft servers.
Video Tutorial
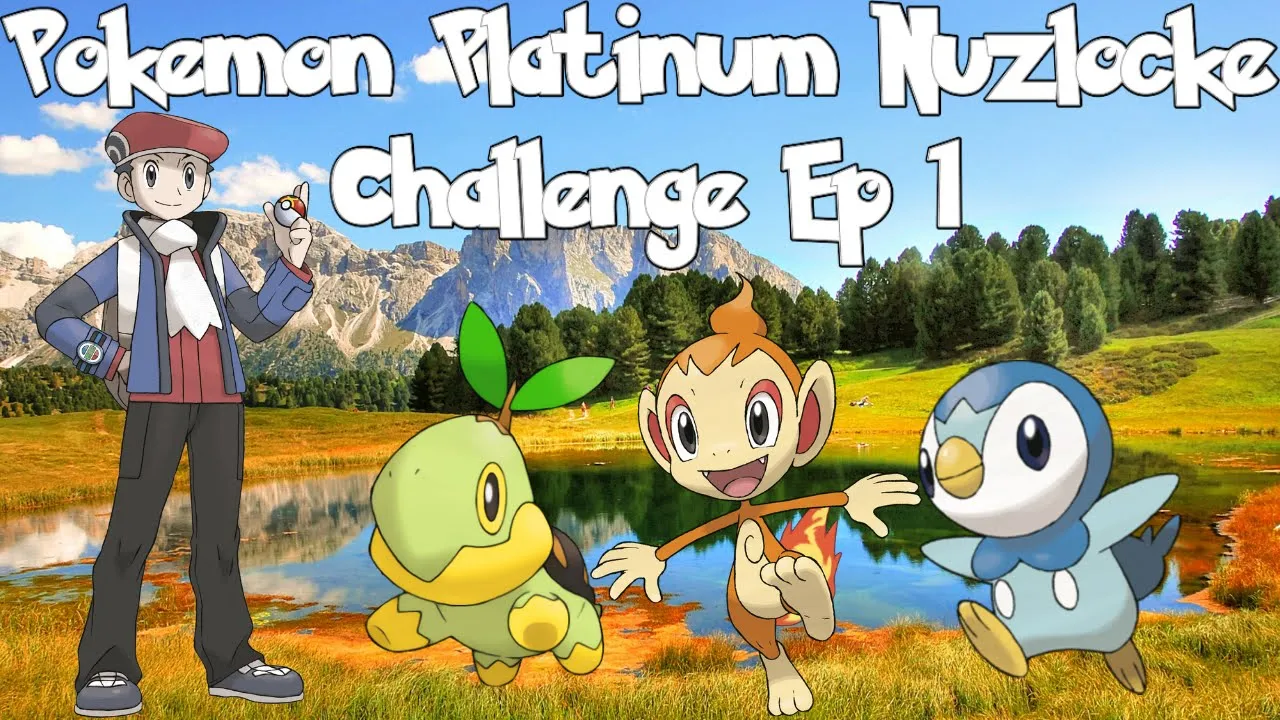
Prefer visual learning? Check out the video tutorial above. This walkthrough demonstrates the complete process of setting up a modded Minecraft server, using Cobblemon as a practical example. The video covers all the essential steps you'll need to follow, making it easy to follow along and set up your own server.
Understanding Mod Loaders: Forge, Fabric, and Quilt
Before diving into server setup, it's important to understand mod loaders. Mod loaders are frameworks that allow mods to run in Minecraft. The three main options are:
- Forge: The oldest and most established mod loader, with the largest library of mods. Great for large modpacks and complex tech/magic mods.
- Fabric: A lightweight, modern mod loader that's faster and more modular. Popular with newer mods and performance-focused modpacks.
- Quilt: A fork of Fabric with additional features and improvements. Compatible with most Fabric mods.
Your choice of mod loader depends entirely on which mods you want to use. Always check your mod's requirements before selecting a loader. For instance, if you're setting up a Cobblemon server, you'll need Fabric. Make sure all your mods are compatible with the same loader and Minecraft version!
Step 1: Select Your Server Plan
After choosing a hosting provider, the next decision is selecting the right server plan. The plan you need depends on how many players you expect and how many mods you'll be running. Generally speaking, a Gold tier plan handles 3-5 players comfortably with a moderate number of mods. For larger groups of 5-8 players or extensive modpacks with many mods, the Diamond tier provides better performance and stability.
One of the great things about hosting a server with friends is cost-sharing. When you divide the monthly fee among your group, each person usually pays around $1-2 per month—an incredibly affordable way to enjoy modded Minecraft together!
Step 2: Configure Server Settings
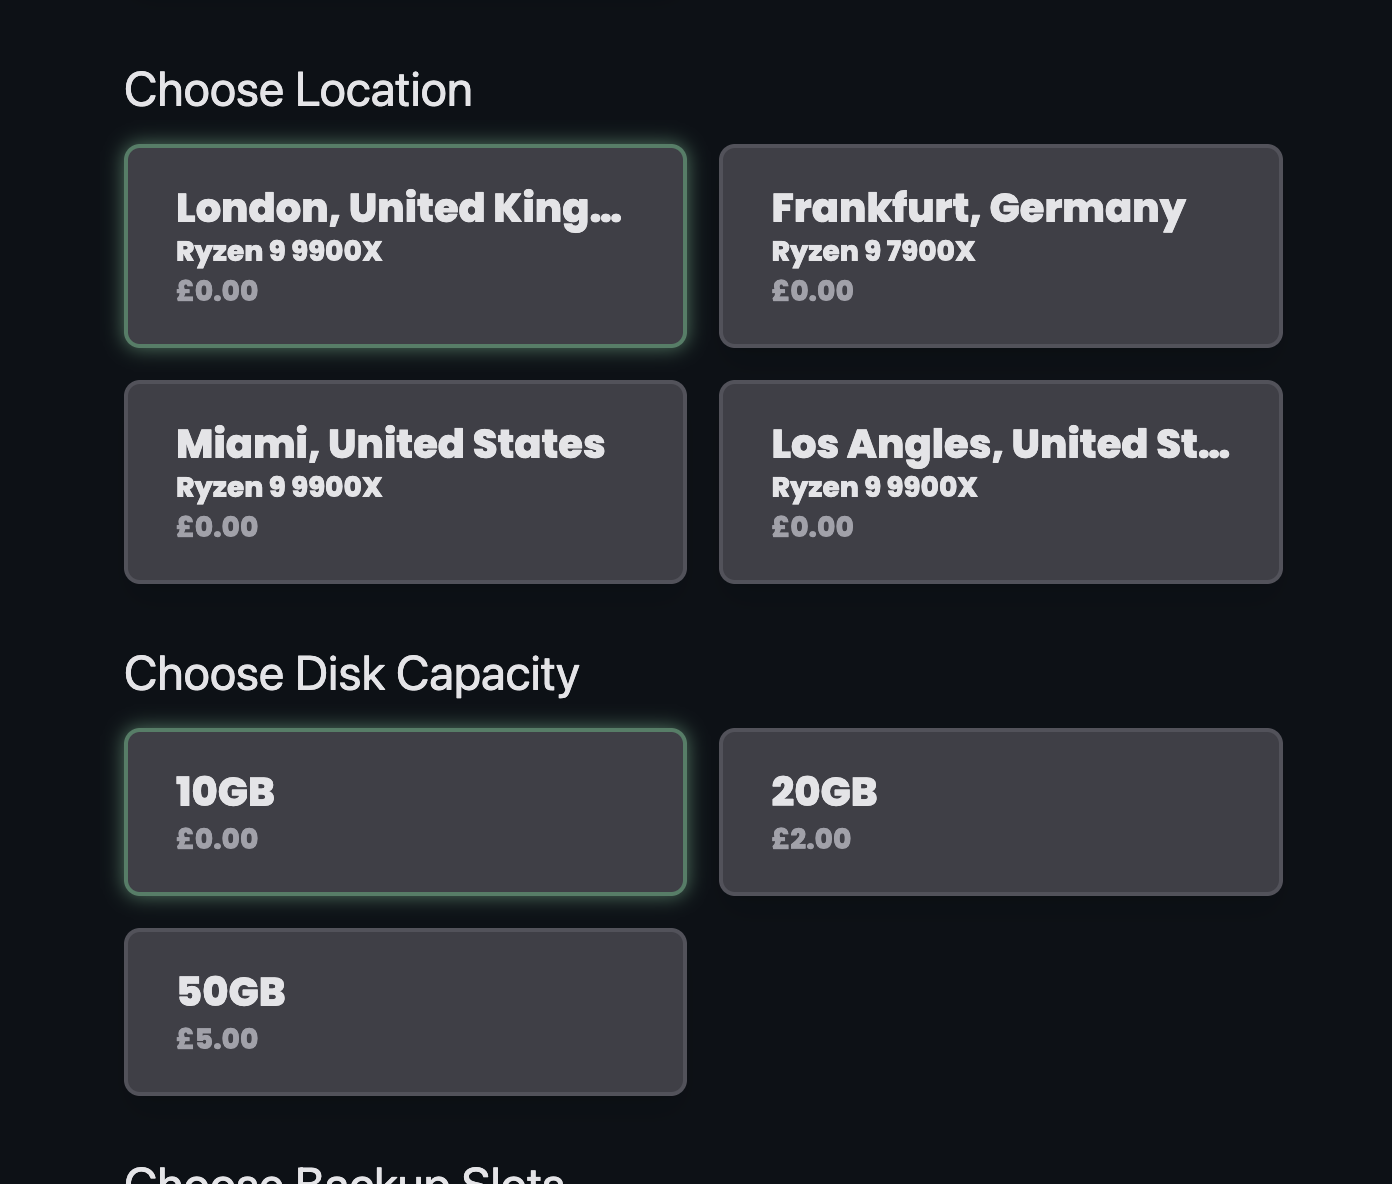
During the purchase process, you'll configure your server settings including name and location. When selecting a server location, pick the one nearest to where most of your players will be connecting from. However, don't stress too much about finding the absolute closest option—modern hosting infrastructure means that even servers located far away typically provide excellent connection quality with minimal latency. I've personally used servers hosted thousands of miles away without any noticeable lag.
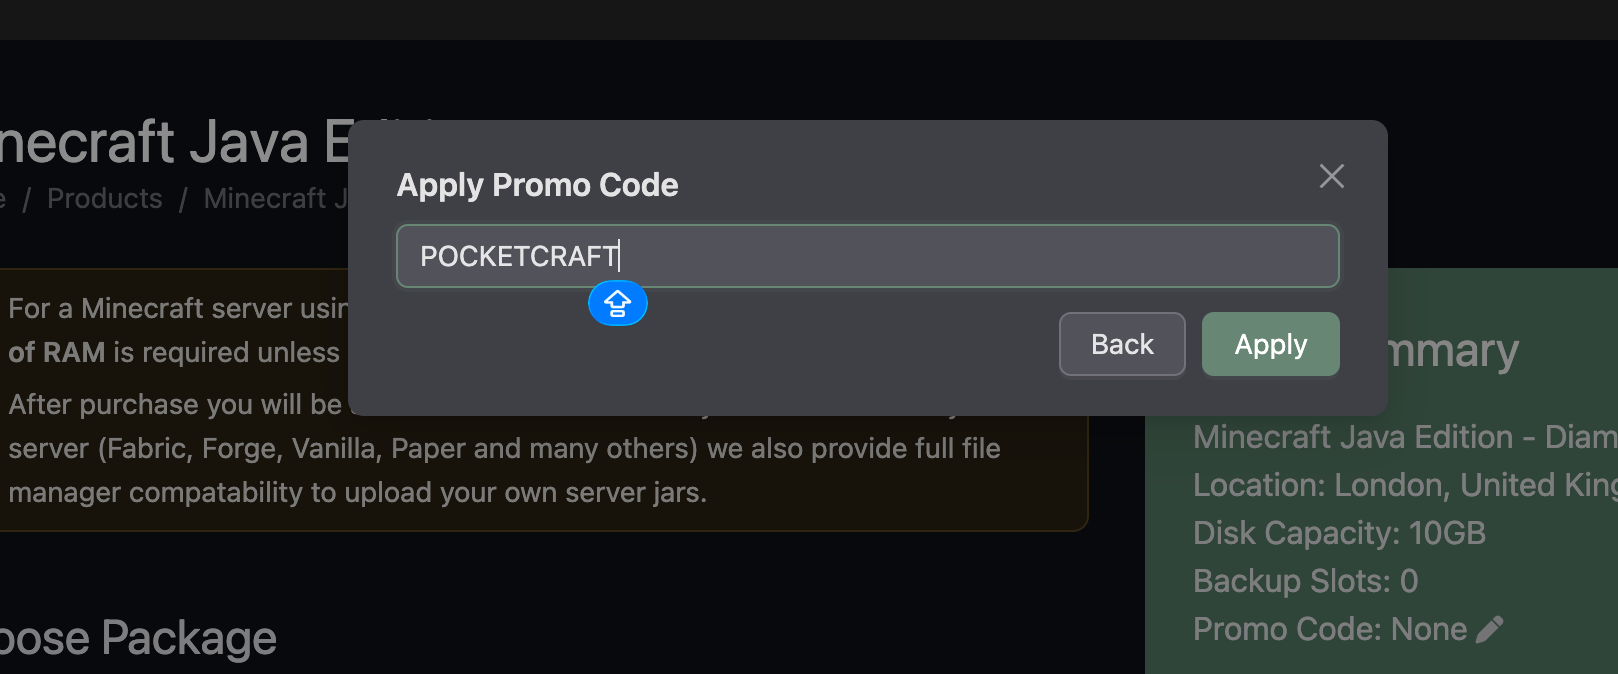
Step 3: Complete Purchase with Discount
As you finalize your purchase, don't forget to apply the promo code POCKETCRAFT to receive 20% off your first month of hosting! This discount makes getting started even more affordable and gives you a chance to test out the service at a reduced rate. Savings like this can really add up, especially when you're new to server hosting.
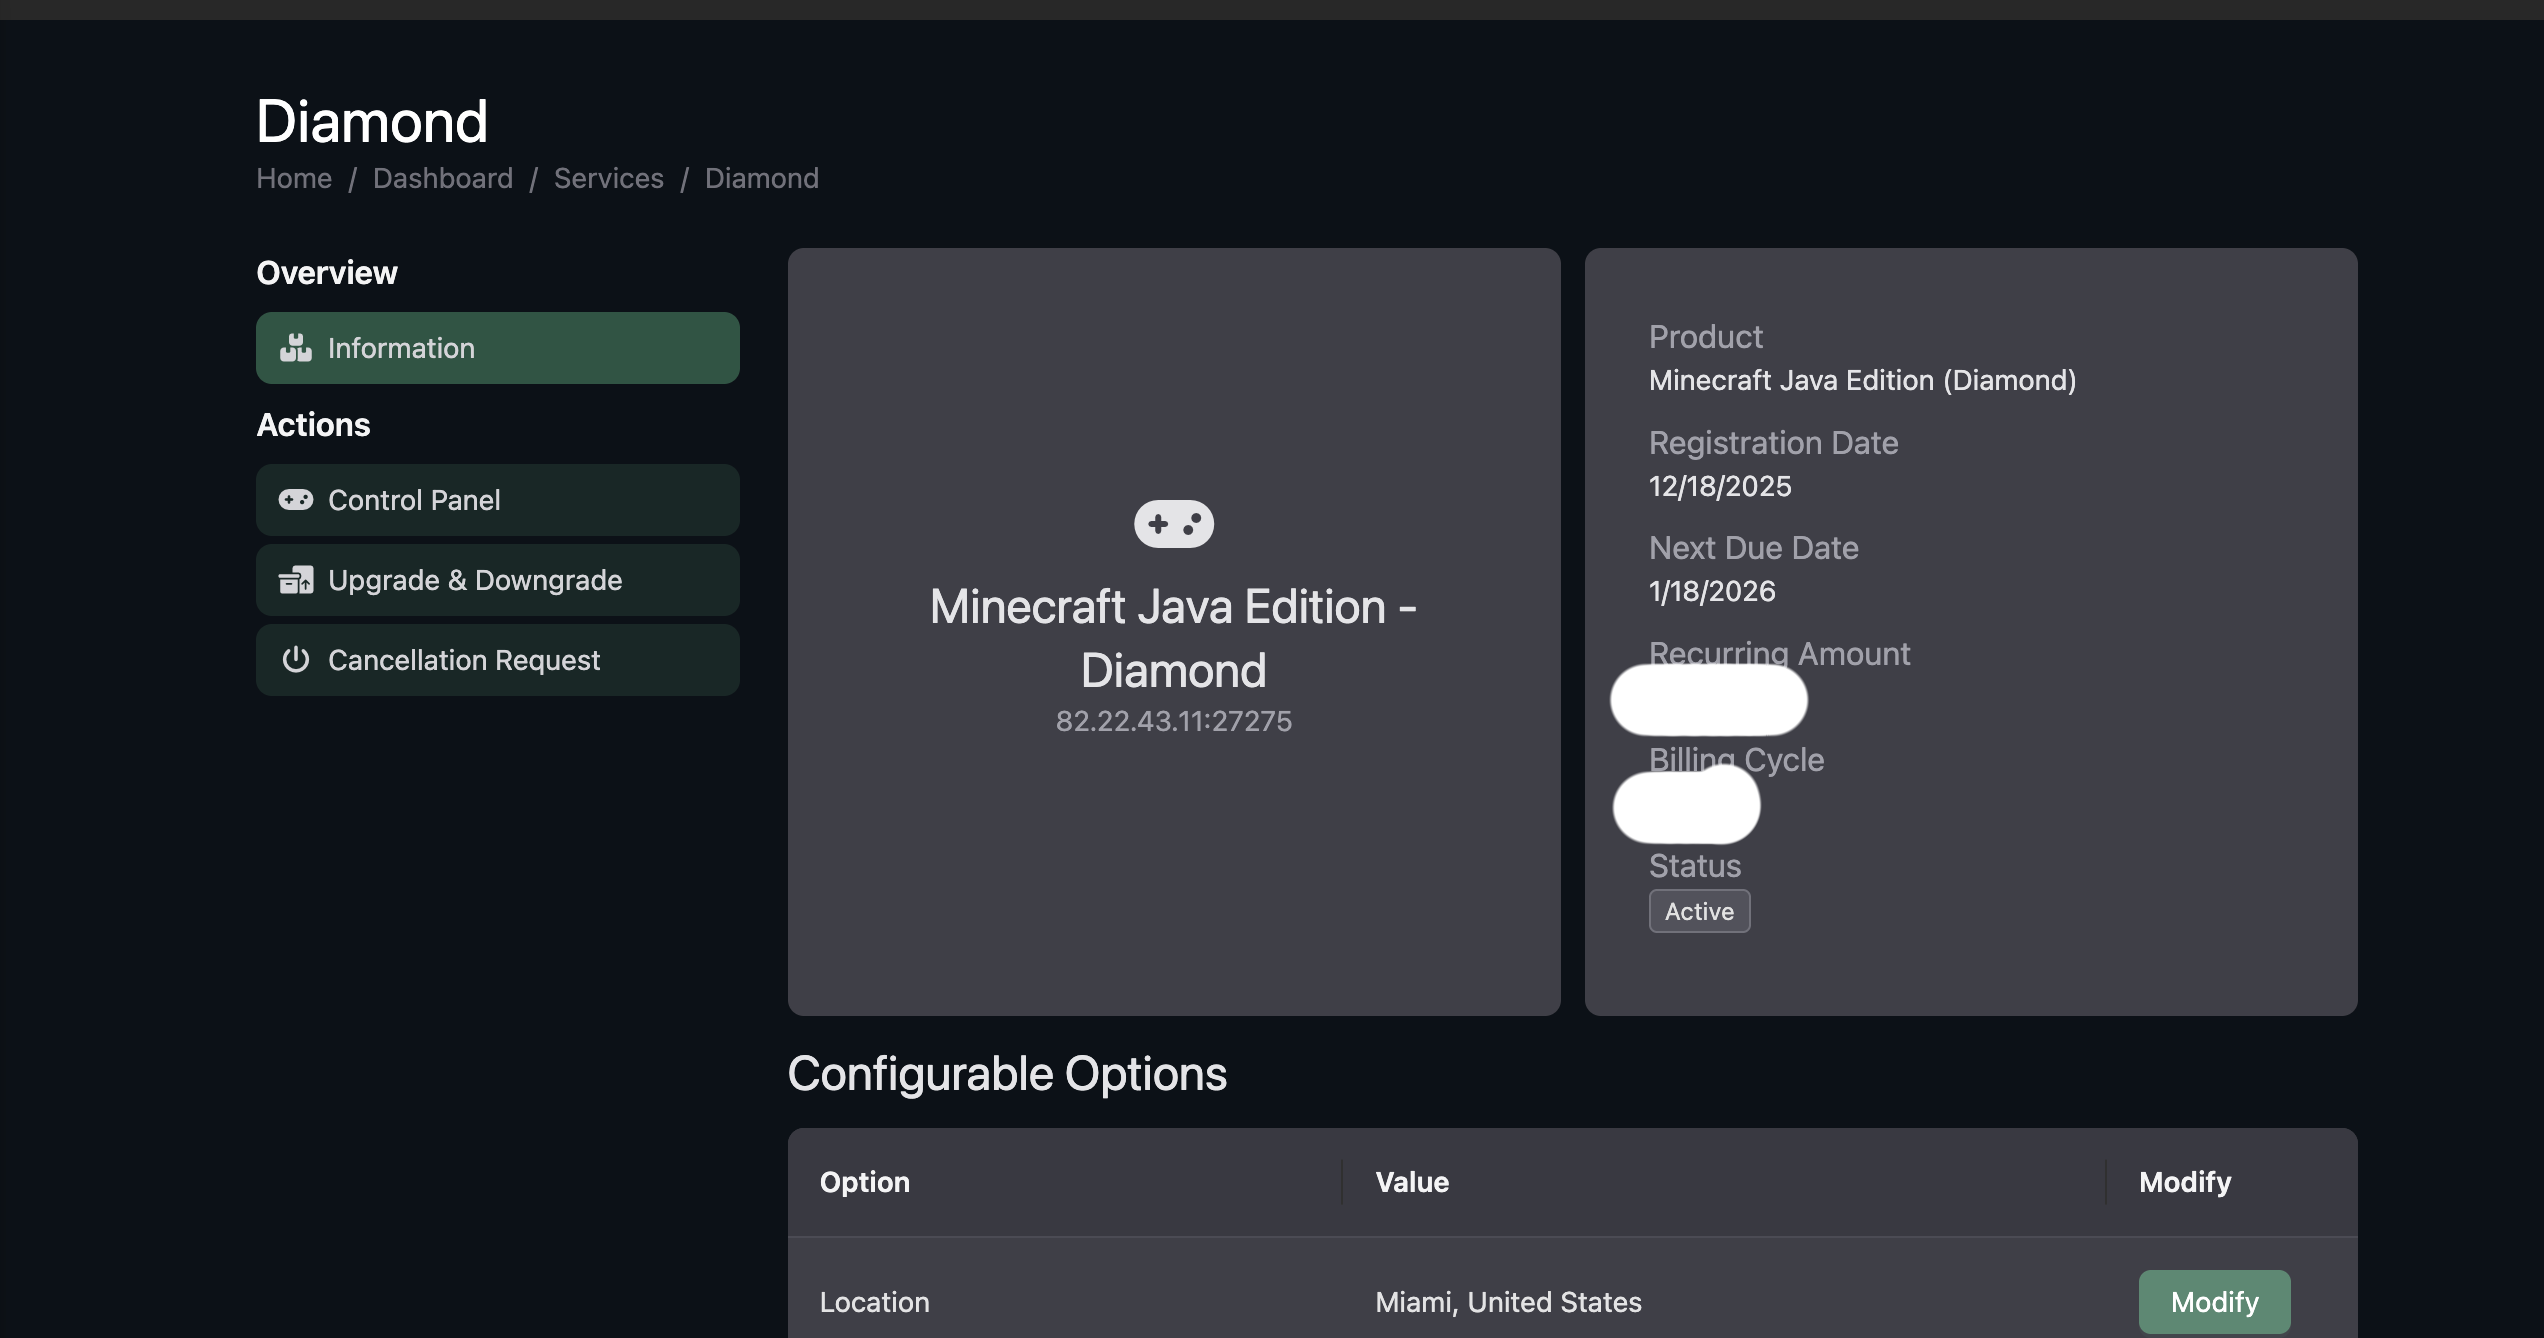
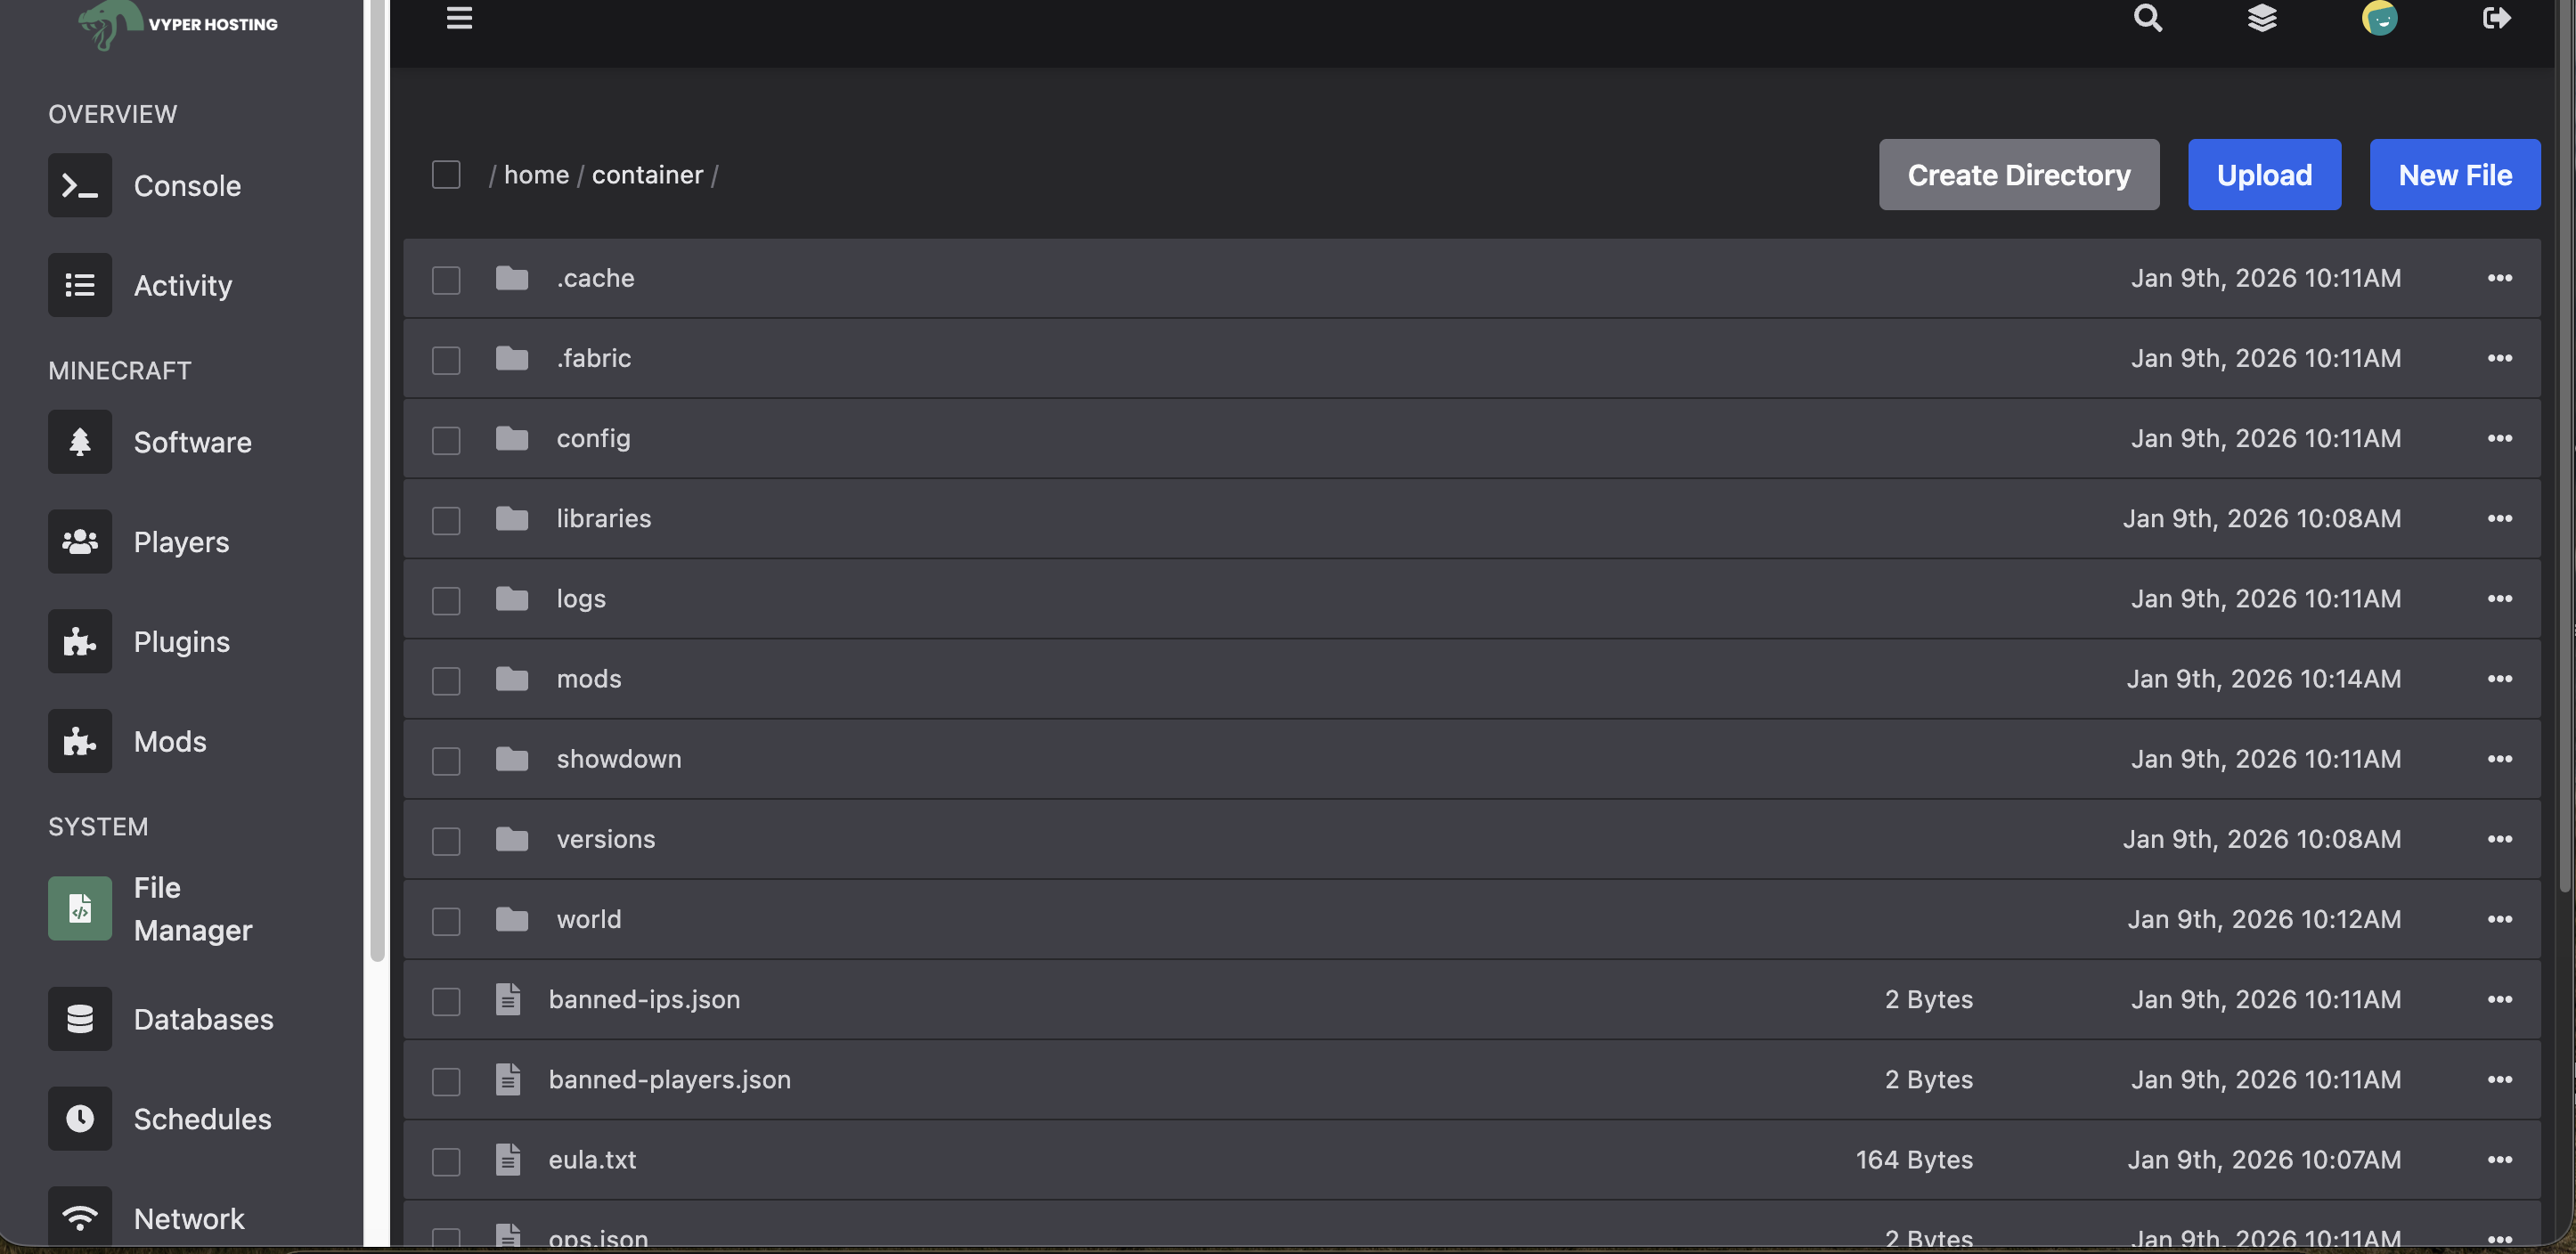
Step 4: Navigate to Your Control Panel
Once your purchase is complete, you'll gain access to your server's control panel dashboard. This web-based interface is where you'll handle all server management tasks—from installing mods to monitoring performance. To begin the configuration process, simply click on your newly created server from the dashboard.
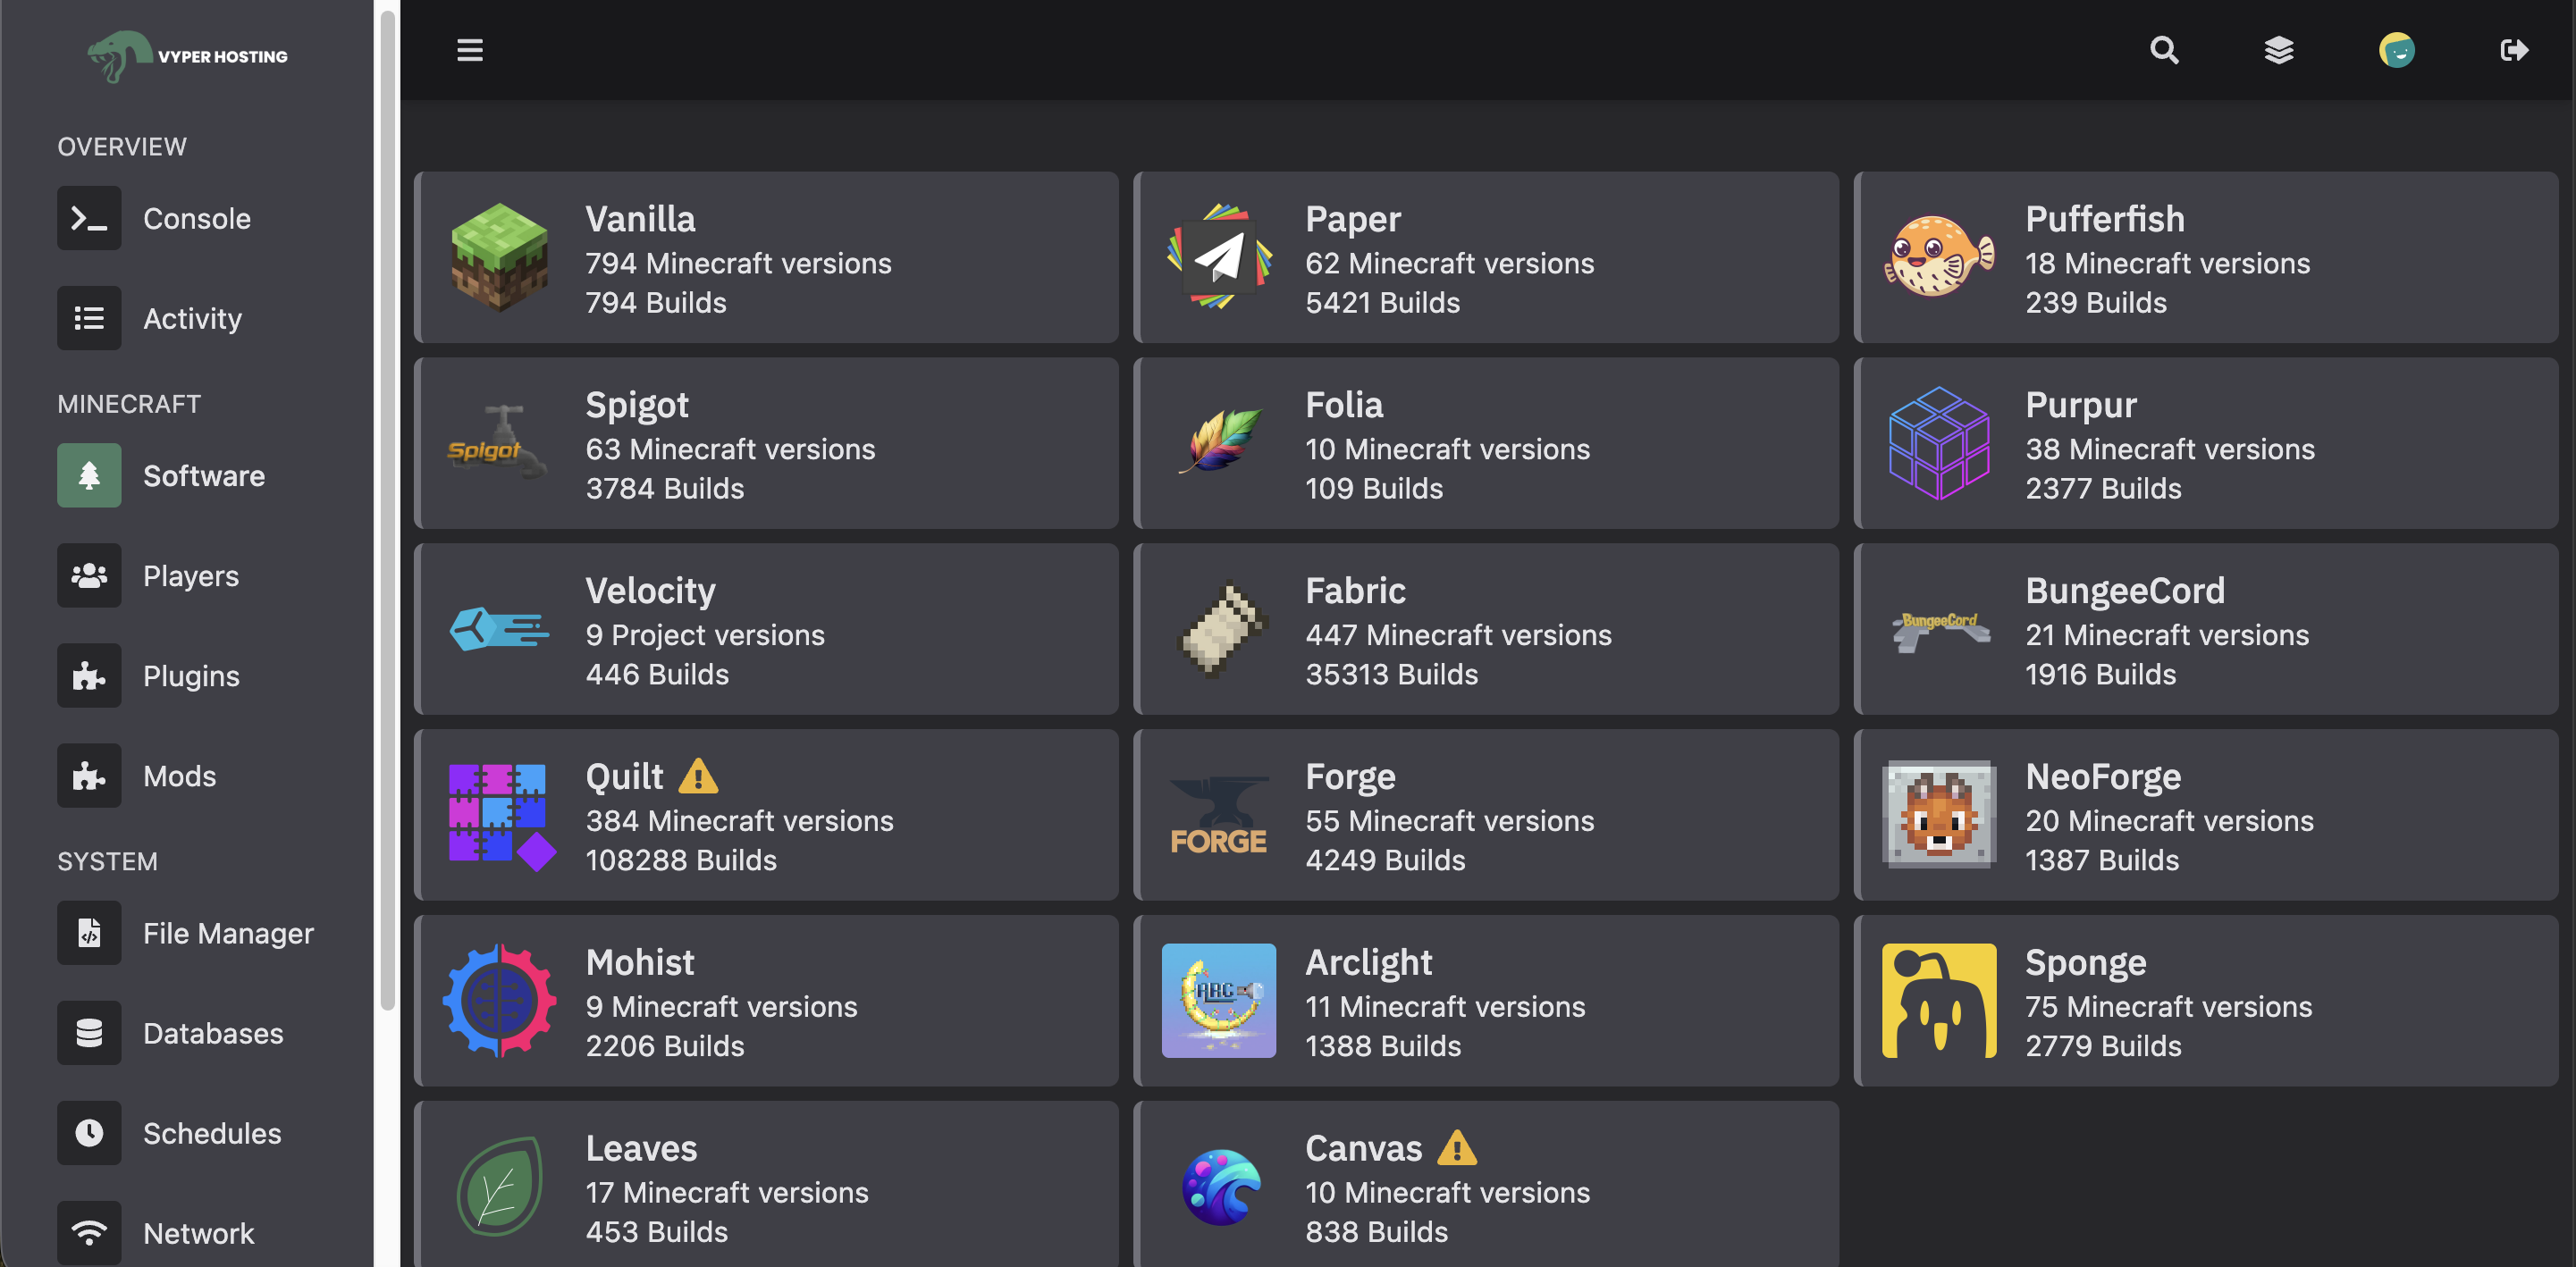
Step 5: Choose and Install Your Mod Loader
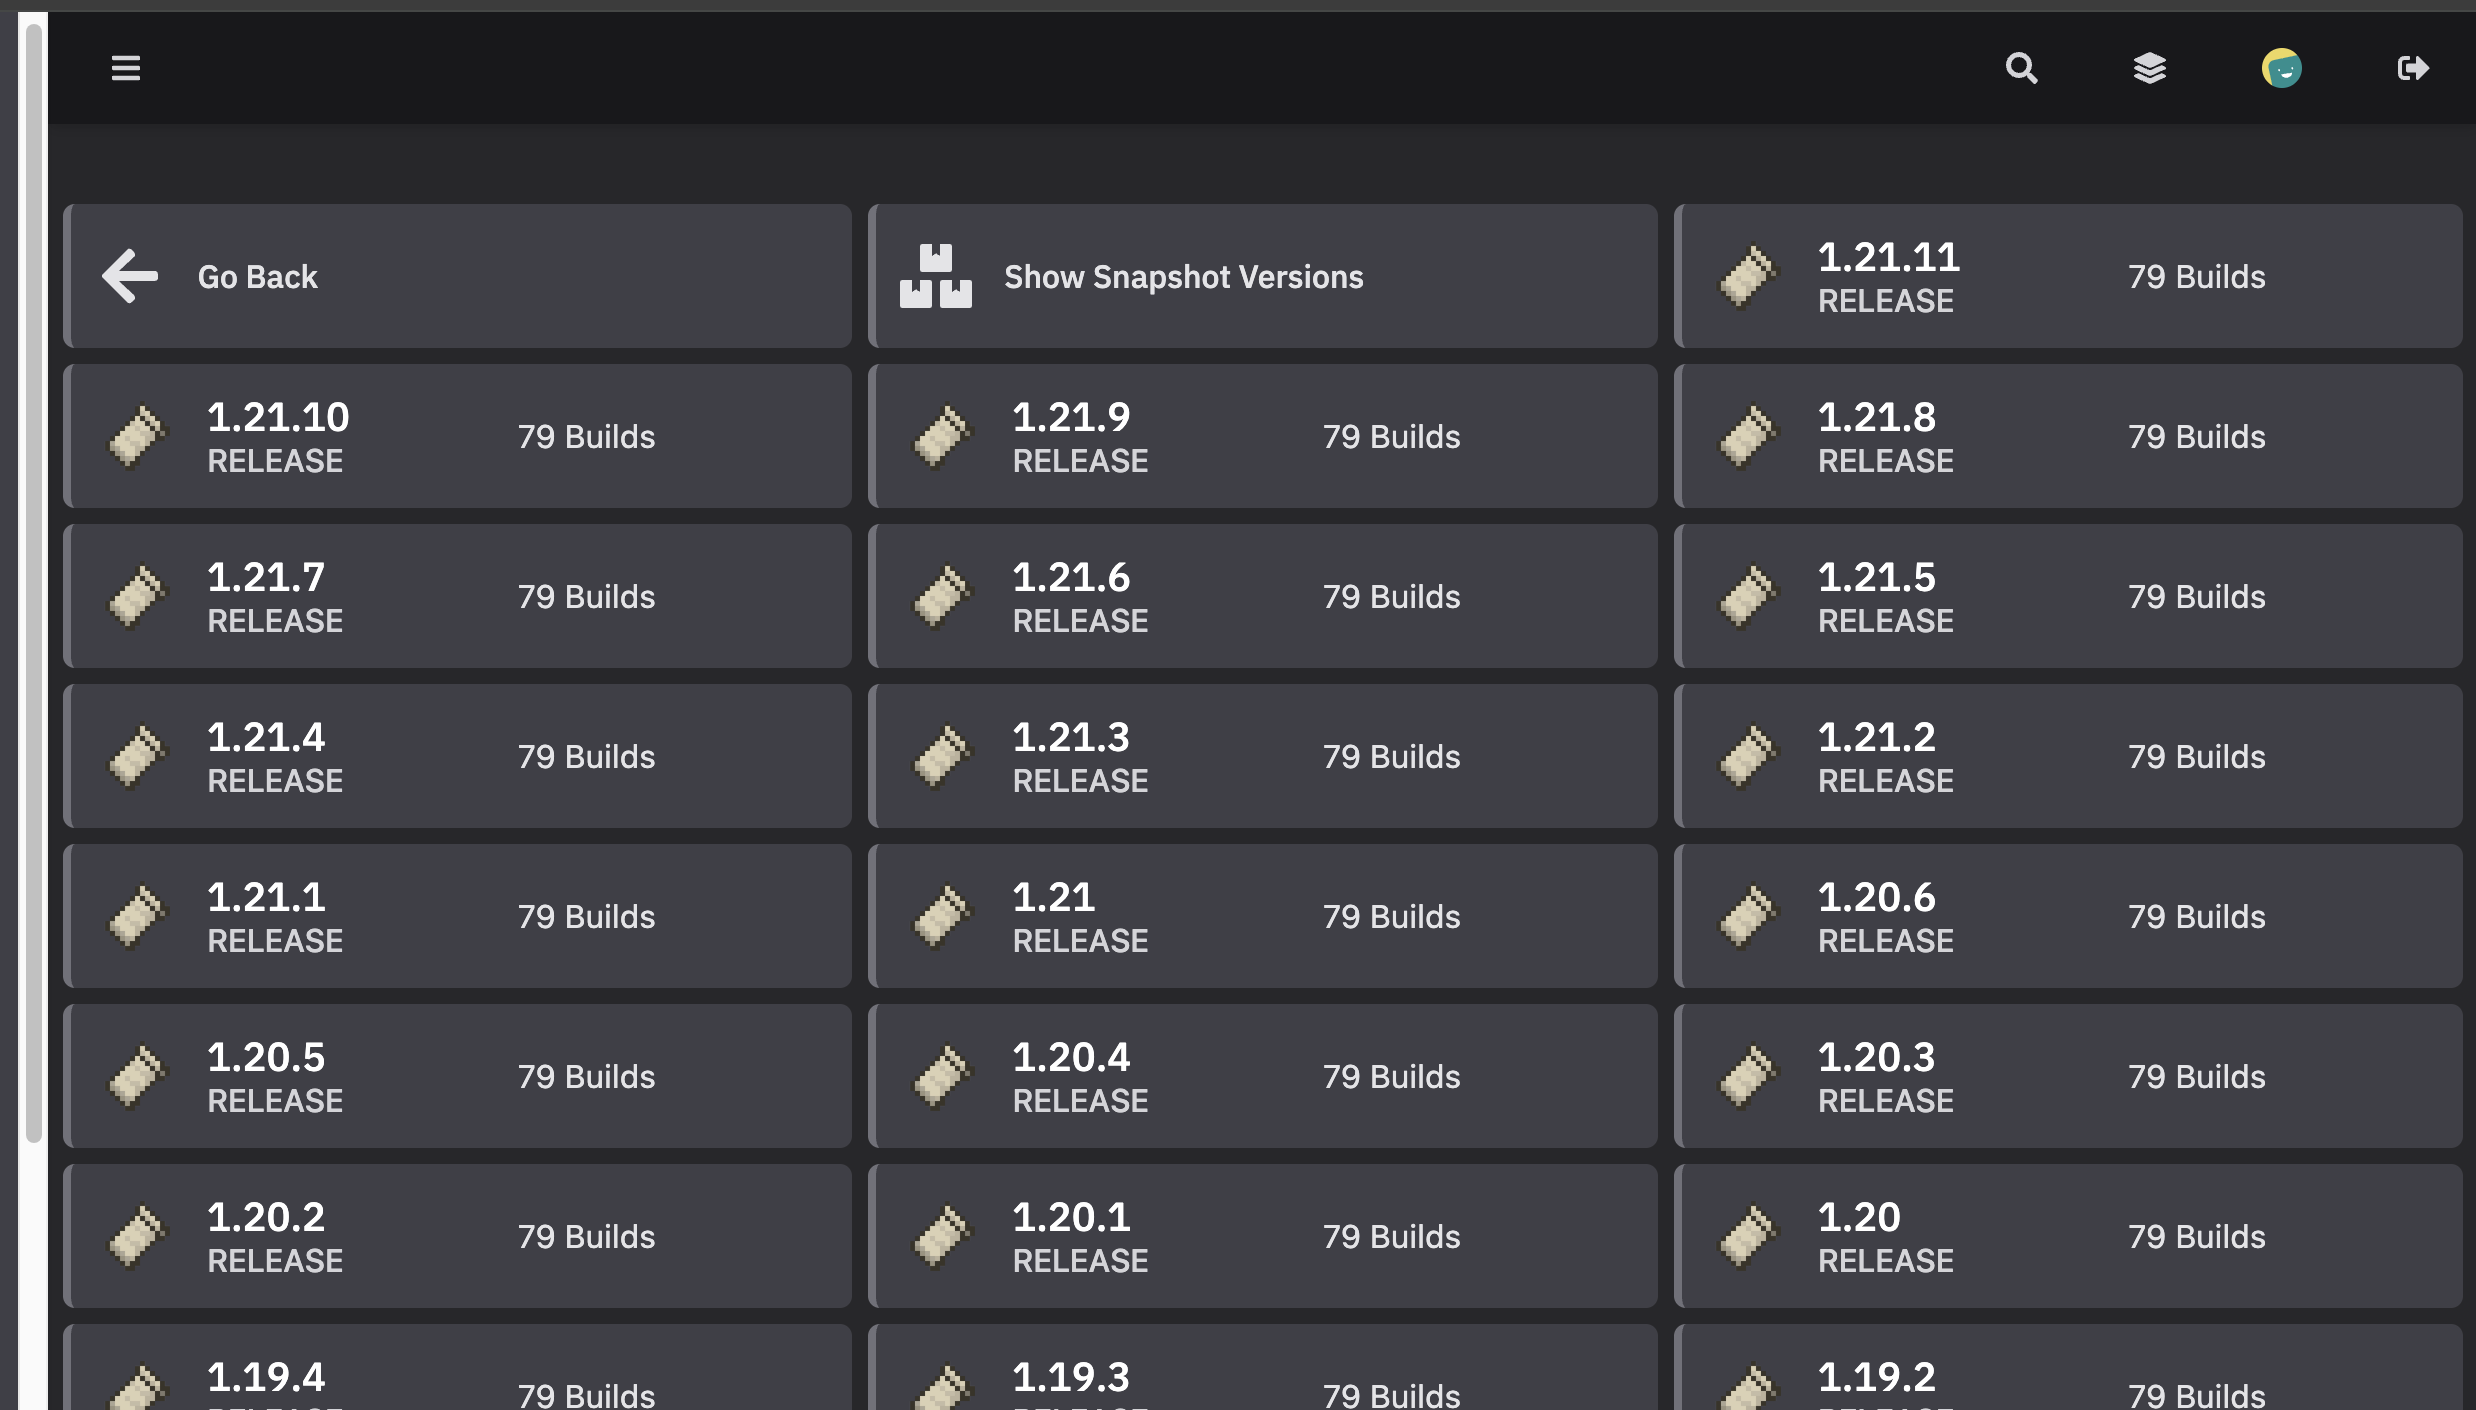
This is a critical step: selecting the correct mod loader. Navigate to the "Software" section in your control panel, where you'll see options for different mod loaders. You must choose the one that matches your mod's requirements. For example, if you're setting up a Cobblemon server, you would select Fabric. Other popular mods might require Forge or Quilt instead. Additionally, ensure you select the correct Minecraft version that your mods support—this version must match between your mod loader, your mods, and your client.
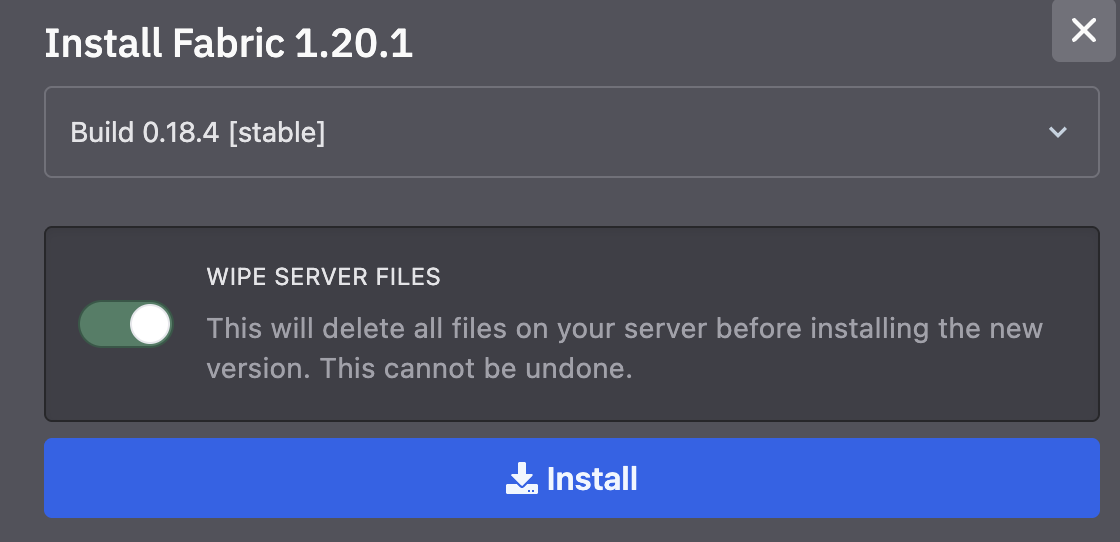
Step 6: Initialize Server with Mod Loader
After choosing your mod loader and version, proceed by clicking the "Wipe server files and install" button. This action removes any existing server files and performs a clean installation of your selected mod loader. This fresh start is essential—it ensures there are no conflicts from previous installations and that your server is properly configured to run modded Minecraft.
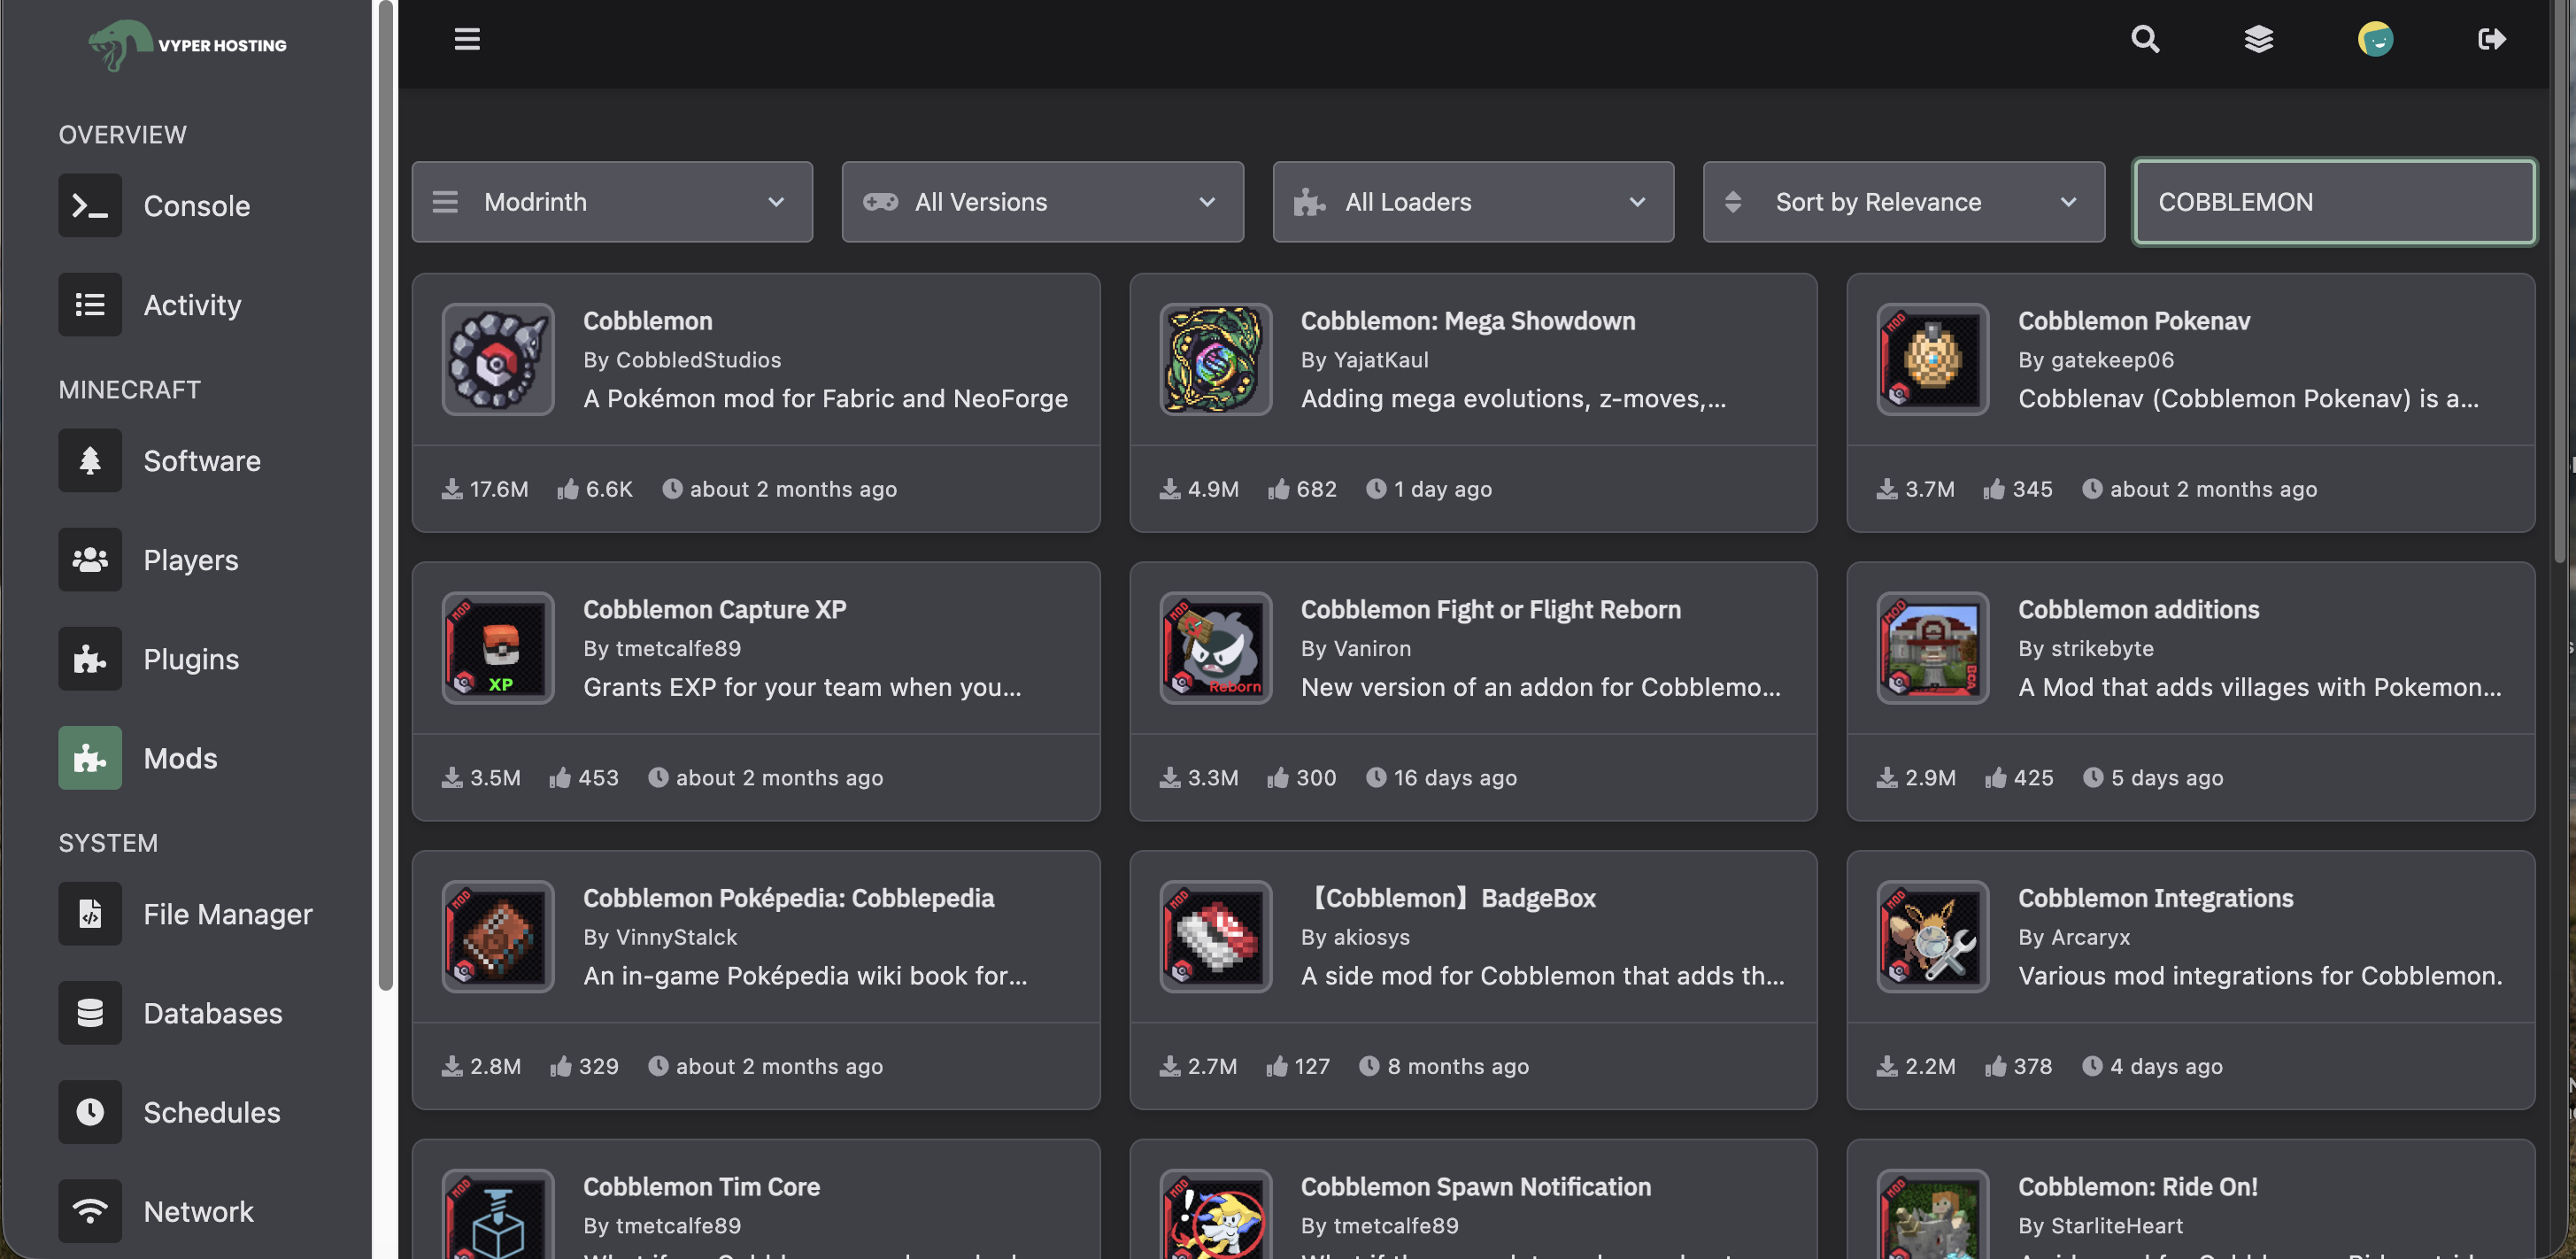
Step 7: Upload Your Mods
Here's where the real customization happens! Access the "Mods" section in your control panel to begin uploading your mod files. This is your opportunity to build the perfect modded experience. You might add performance optimization mods, new content mods, quality-of-life improvements, or combine multiple mods to create your own unique modpack. Just remember: all mods must be compatible with your chosen mod loader and Minecraft version, and you'll need to upload the same mods to both your server and your client.
Step 8: Bulk File Upload (Optional)
For smaller mod collections, the built-in mod uploader works fine. However, if you're installing a large modpack with many mods, using the File Manager or an FTP client like FileZilla can be much more efficient. FileZilla is a free, user-friendly FTP program that allows you to drag and drop entire folders of mods at once, which is perfect for comprehensive modpacks.
If you're new to FTP file transfers, I've created a detailed tutorial video demonstrating how to use FileZilla to upload files to your server. Check it out below:
Step 9: Launch Your Server
With all your mods in place, you're ready to boot up your server! Head to the "Console" tab in your control panel and click the "Start" button. The console will display real-time server logs as it initializes. Watch for any error messages—if everything loads successfully, you'll see messages indicating the server is ready to accept connections. The first startup might take a bit longer as the server generates world files and loads all your mods.
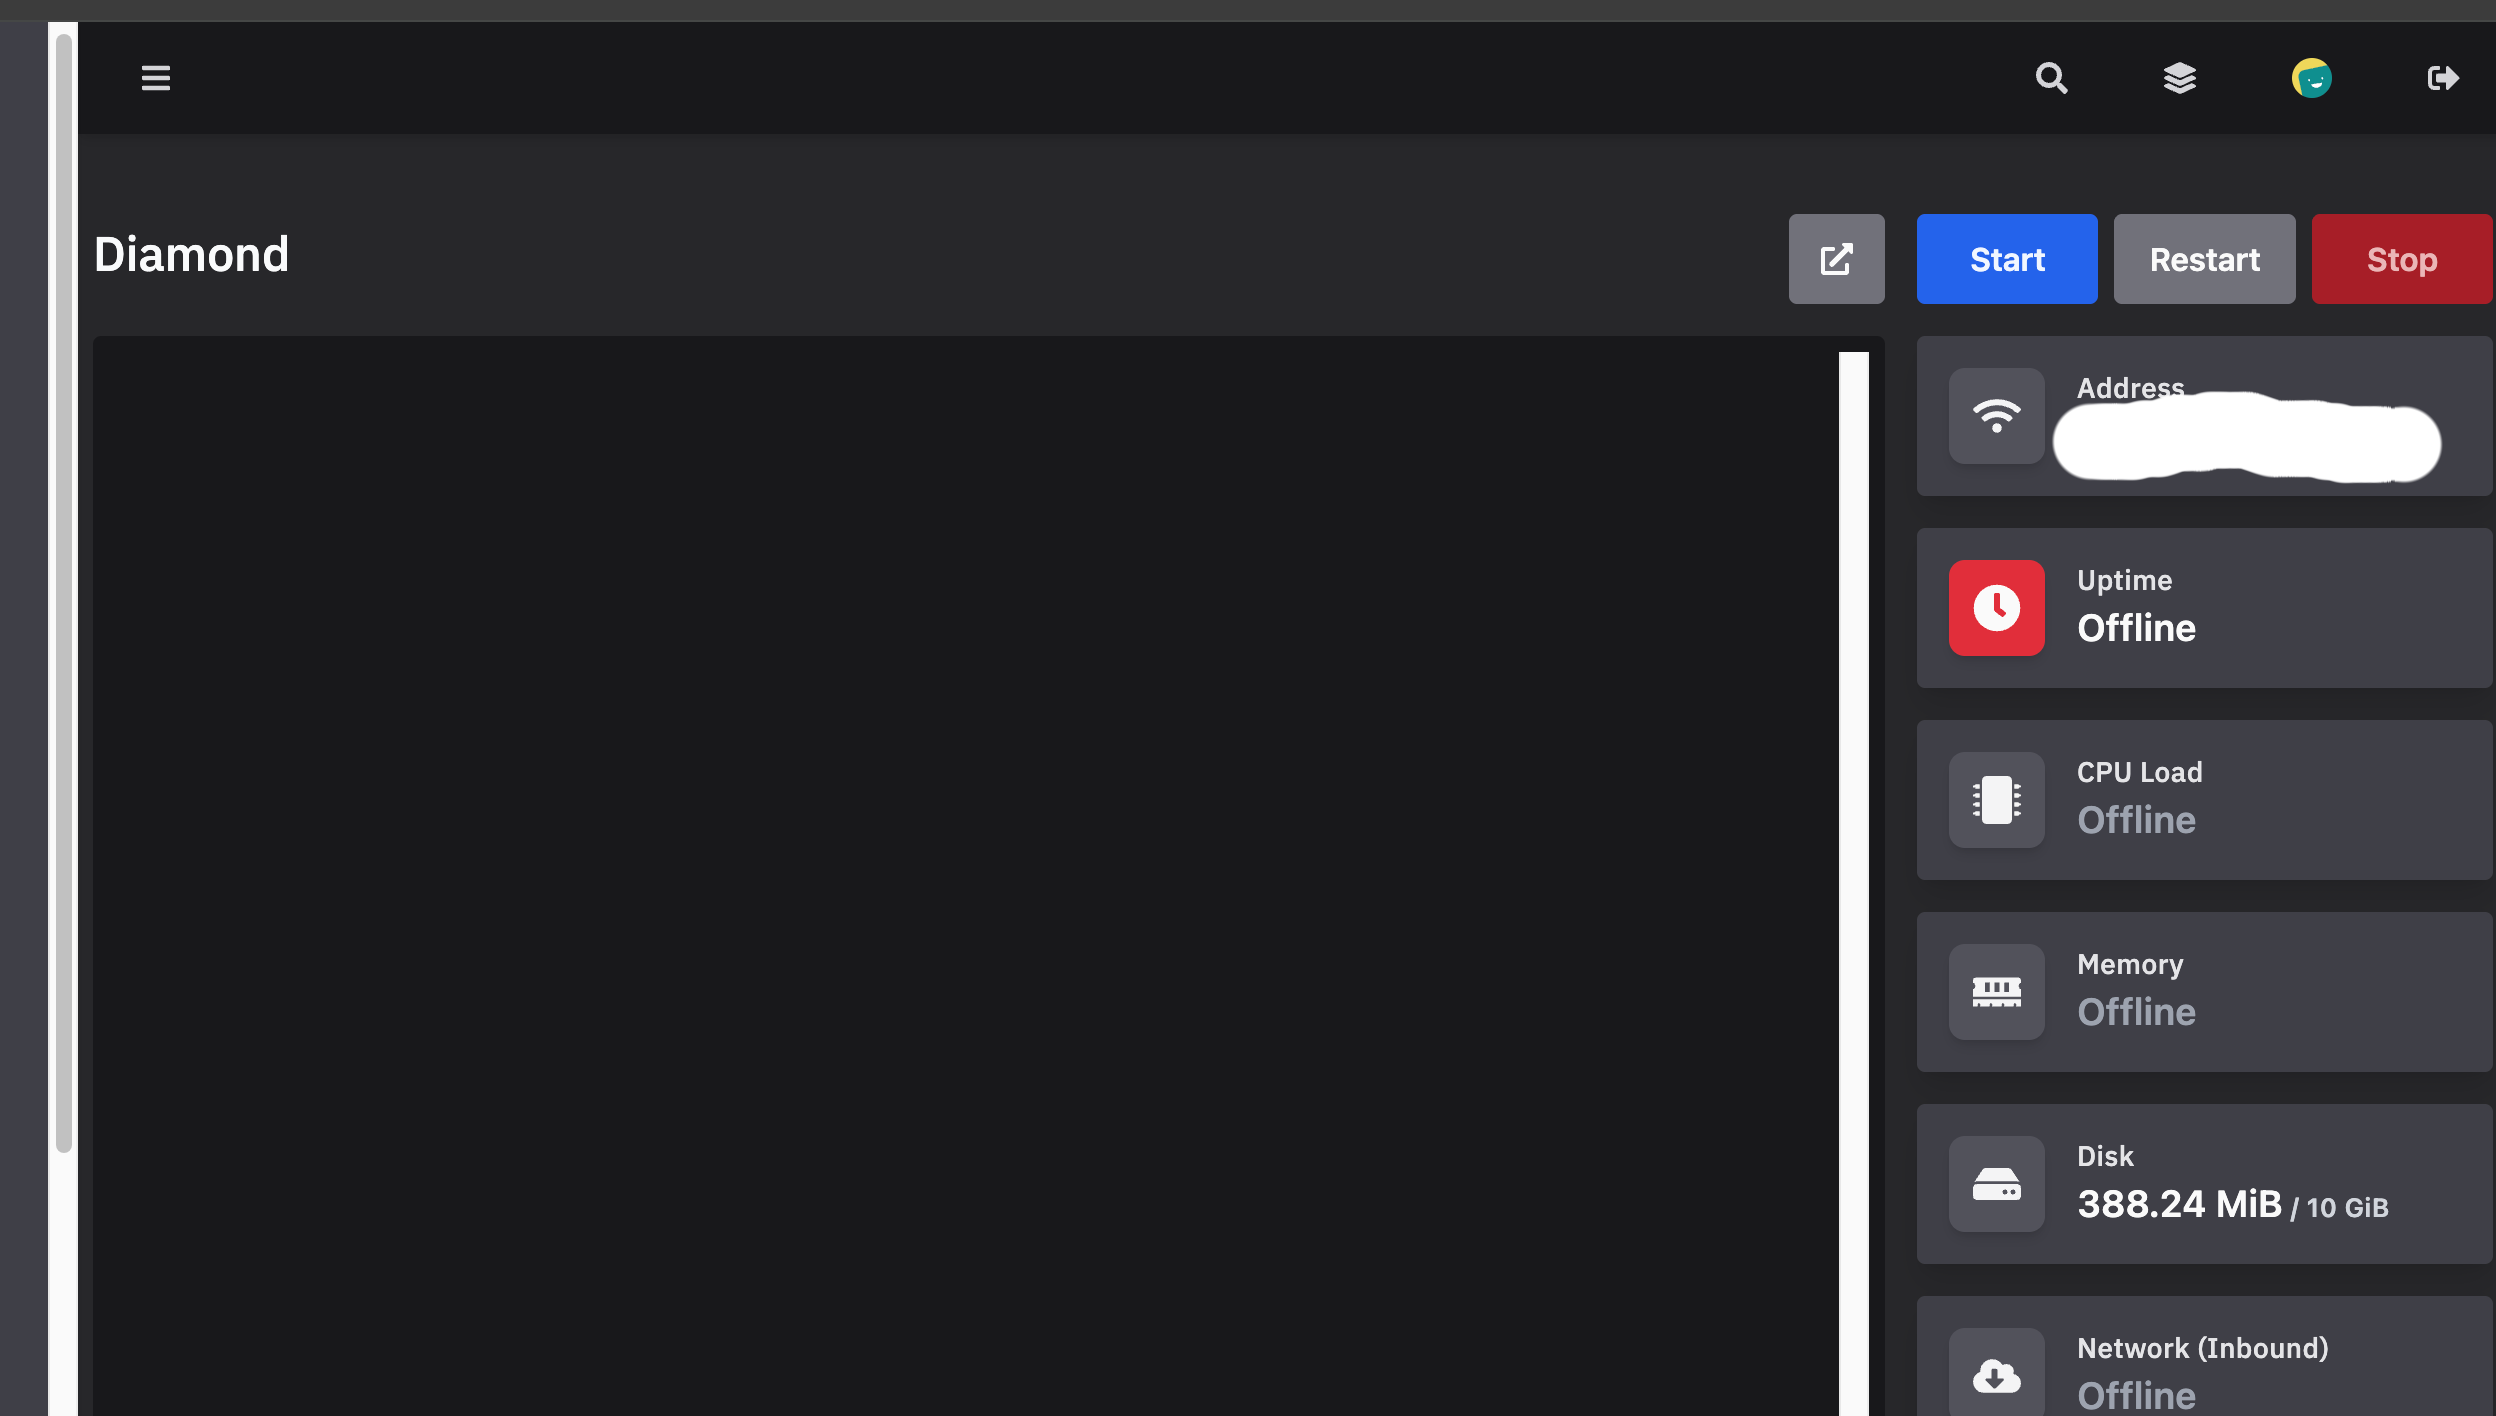
Step 10: Join Your Server
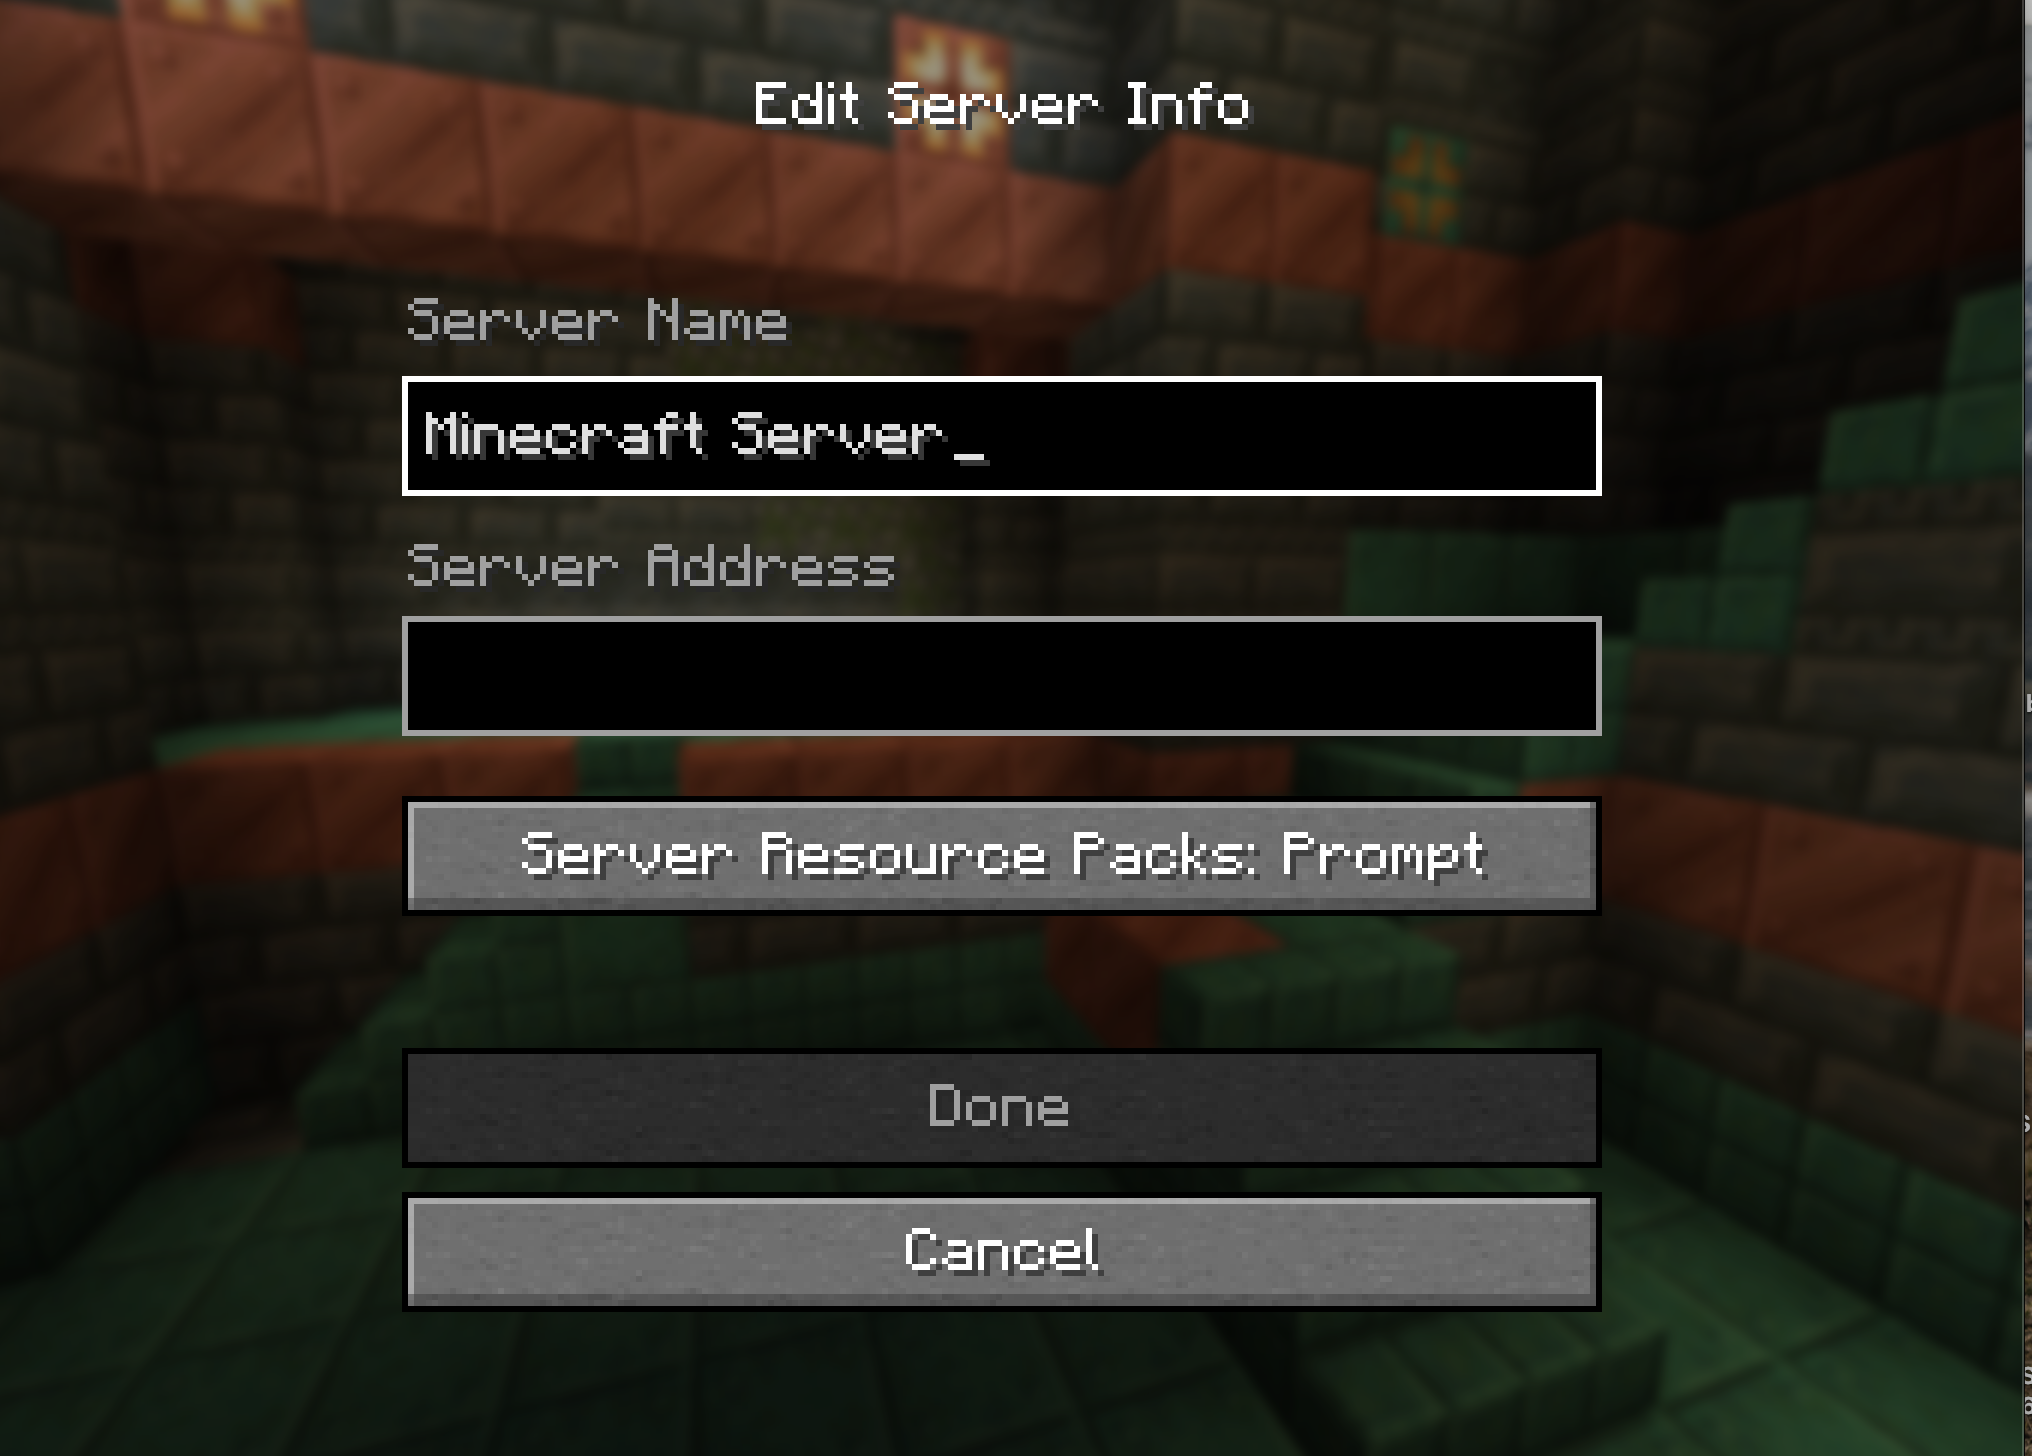
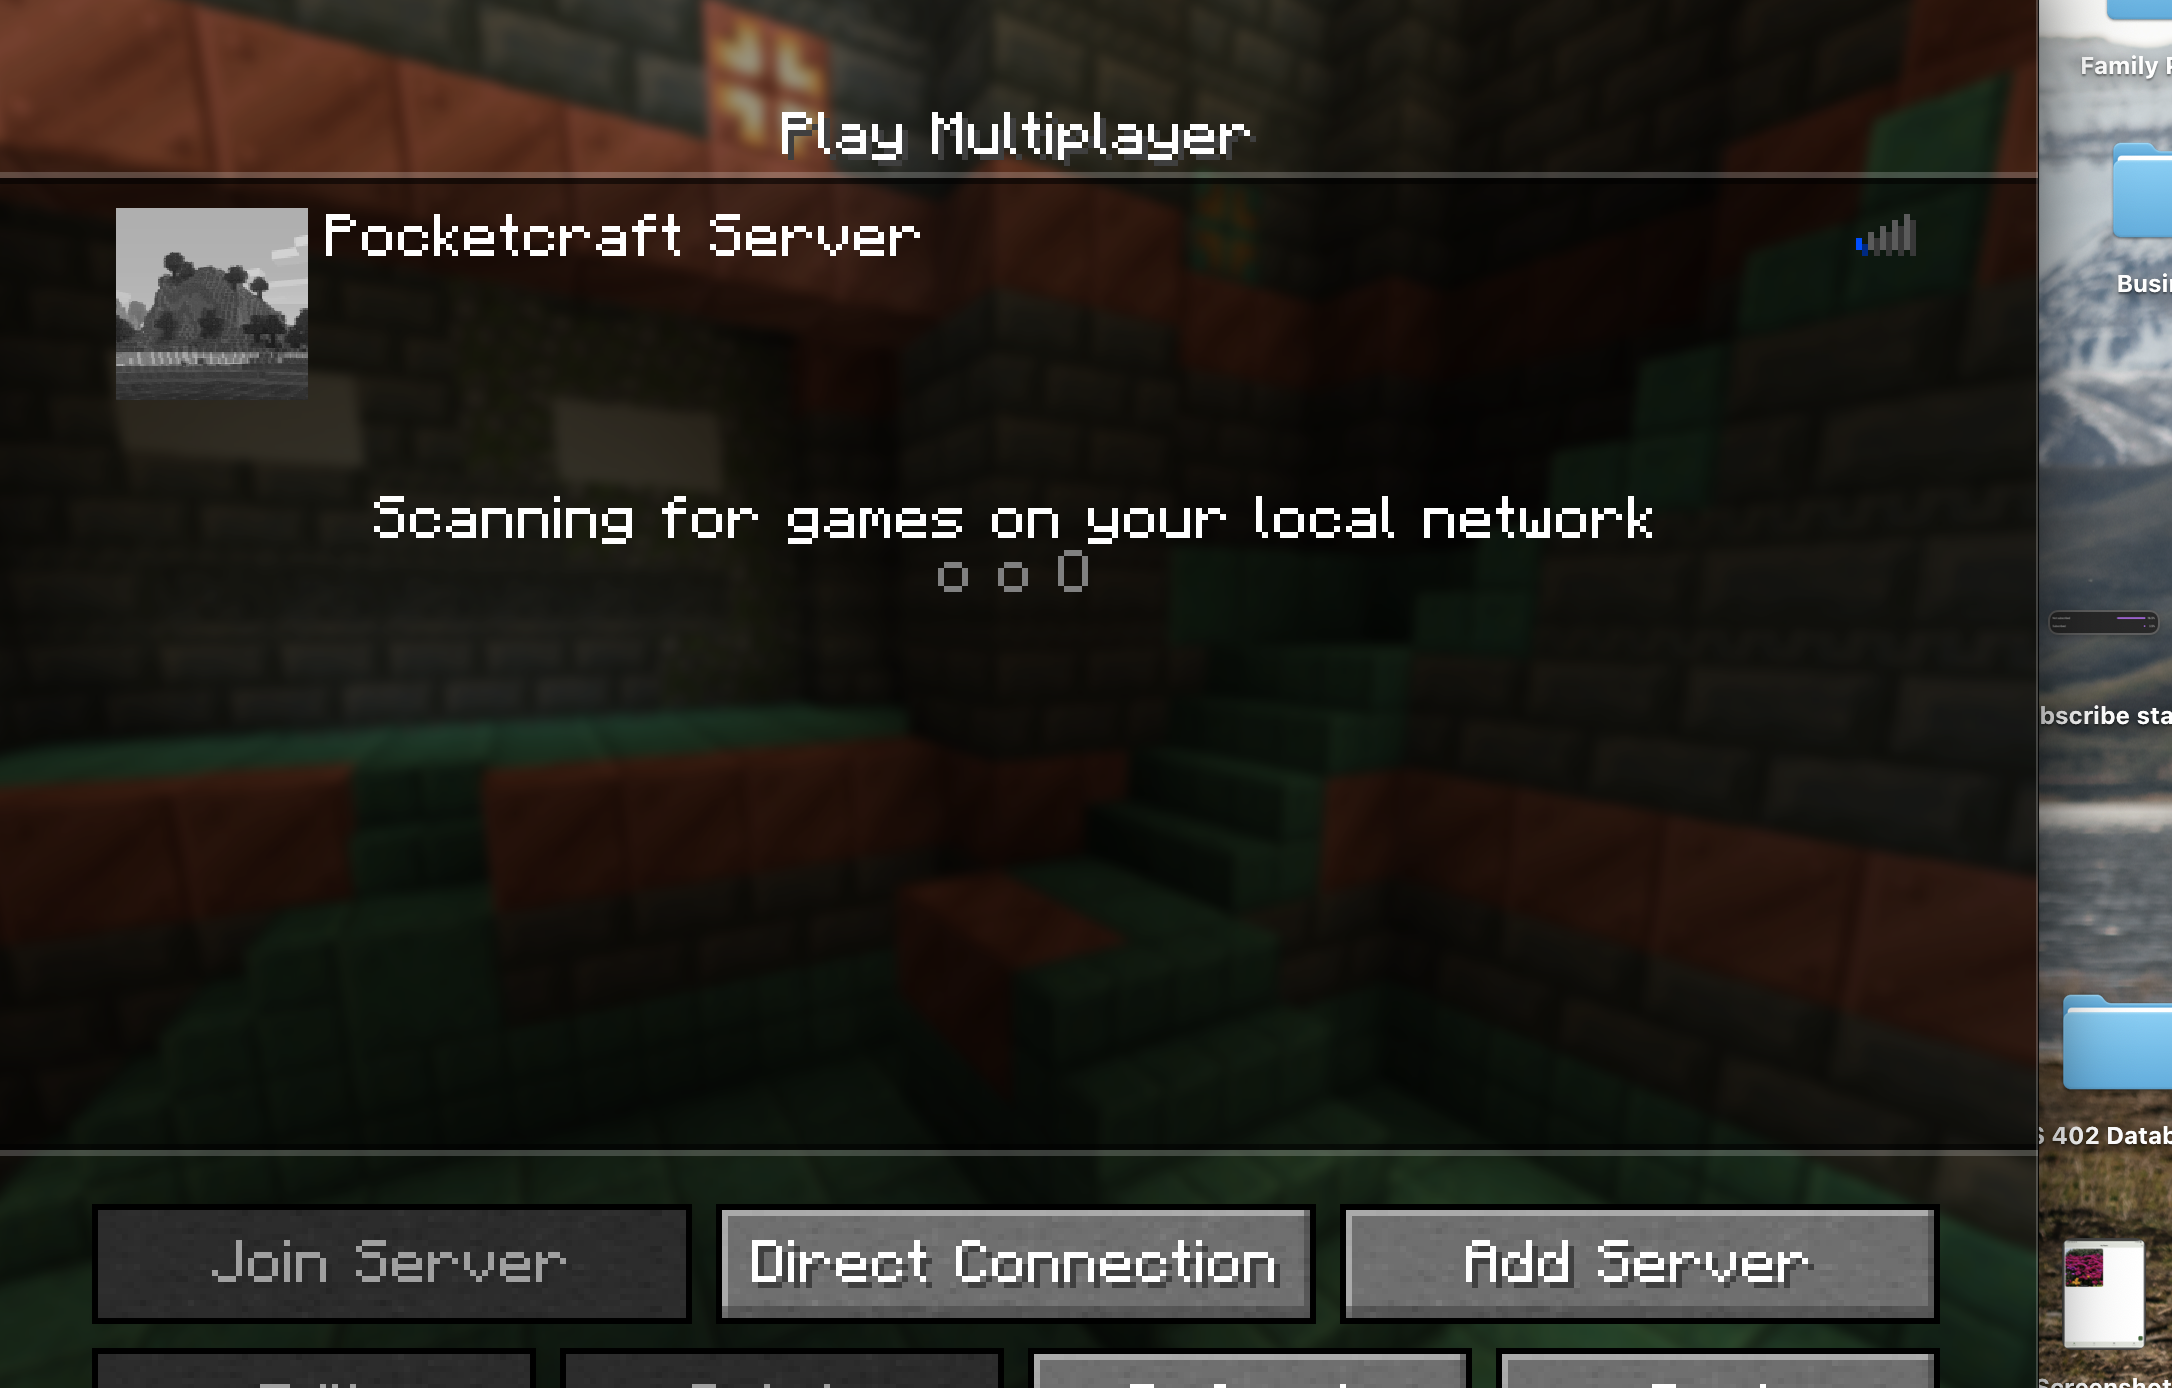
The final step is connecting to your server! Locate your server's IP address in the control panel and copy it. Then launch Minecraft (making sure you have the same mods and versions installed on your client), navigate to the "Multiplayer" menu, and click "Add Server". Give your server a memorable name and paste the IP address into the server address field.
Share the IP address with your friends so they can join too! Make sure everyone has the exact same mods installed on their clients, or they won't be able to connect. Once everyone is connected, you can start exploring your modded world together, experimenting with new mod features, and creating amazing builds with all the new tools and blocks your mods provide.
Your Modded Server is Ready!
Excellent work! Your modded Minecraft server is now up and running. You and your friends can dive into your customized modded world whenever you want. A few important reminders: keep your mods and server software updated to the latest versions, regularly back up your world files (most hosting providers offer automated backups), and if you add new mods later, make sure all players update their clients accordingly.
Should you encounter any technical difficulties, your hosting provider's support team is there to help. Most offer 24/7 support through live chat or tickets. For more modded Minecraft tips, server management advice, and mod recommendations, explore my other tutorials and guides!
More Cobblemon Tutorials
If you found this helpful, you'll enjoy my other tutorials found here on Cobblemon tips, tricks, and guides.
Channel Members Get Access To Exclusive Perks
Click here to help support the channel
Pokemon Mascot
Friends Across Platforms
Exclusive Videos
Affiliate Disclosure
This guide contains affiliate links to Vyper Hosting. This means that if you click on the link and make a purchase, I may receive a commission at no additional cost to you. I only recommend products and services that I personally use and believe will be valuable to my readers. The affiliate relationship helps support the creation of free content like this tutorial.
Your support through these affiliate links allows me to continue creating helpful guides and tutorials for the modded Minecraft community. Thank you!